
Say It With Feeling: Text Rendering In Custom Hobo
Rendering text is one of the most important, challenging, and taken-for-granted features in any game engine. Displaying crisp fonts of any size in both 2D UIs and 3D worlds requires special care across engine logic, shader code, and external tools. It’s not only critical for ‘boring’ things like config UIs, but also for conveying charm, panache, and emotion through character dialogue.
This blog post discusses how our engine is able to convert a simple string authored by a level designer into the weird and fun dialogue box you see above.
- Atlases: Precomputed textures used to render fonts.
- Rendering MSDF Glyphs: How we can render characters at any size without introducing scaling artifacts.
- Character positioning: Walking a cursor to lay out a string.
- Word and token positioning: Arranging words, wrapping lines, and sharing baselines.
- Text effects: Color, motion, and flies.
Glyphs Live In A Texture Atlas
Fonts ship as vector outlines (.ttf, .otf files), which are math that explains how to draw the font’s glyphs at any size. Unfortunately, vector outlines are not something a GPU knows how to render. Textures, though, are something GPUs are well acquainted with.
A simple but flawed approach would be to render every character of your font onto a single big texture, and then render those characters as if they were any typical sprite. This works well if your font is only ever rendered at one size, but fails miserably if you try to scale your text up or down at all. The human eye is incredibly sensitive to artifacts in text, and scaling fonts is a great way to introduce aliasing and fuzziness.
A much better approach is to use something called a Multi-Channel Signed Distance Field (MSDF). Rather than simply storing the glyphs as black/white data in a texture, MSDF takes advantage of the RGB channels to encode not “is this pixel ink or not” but rather “how far away is this pixel from the edge of my glyph”. Custom shader logic is able to construct a crisp edge at any size using this data.
As an interesting aside, Valve popularized the single-channel version of this technique in 2007. You can read more about it in their paper. The multi-channel refinement came later.
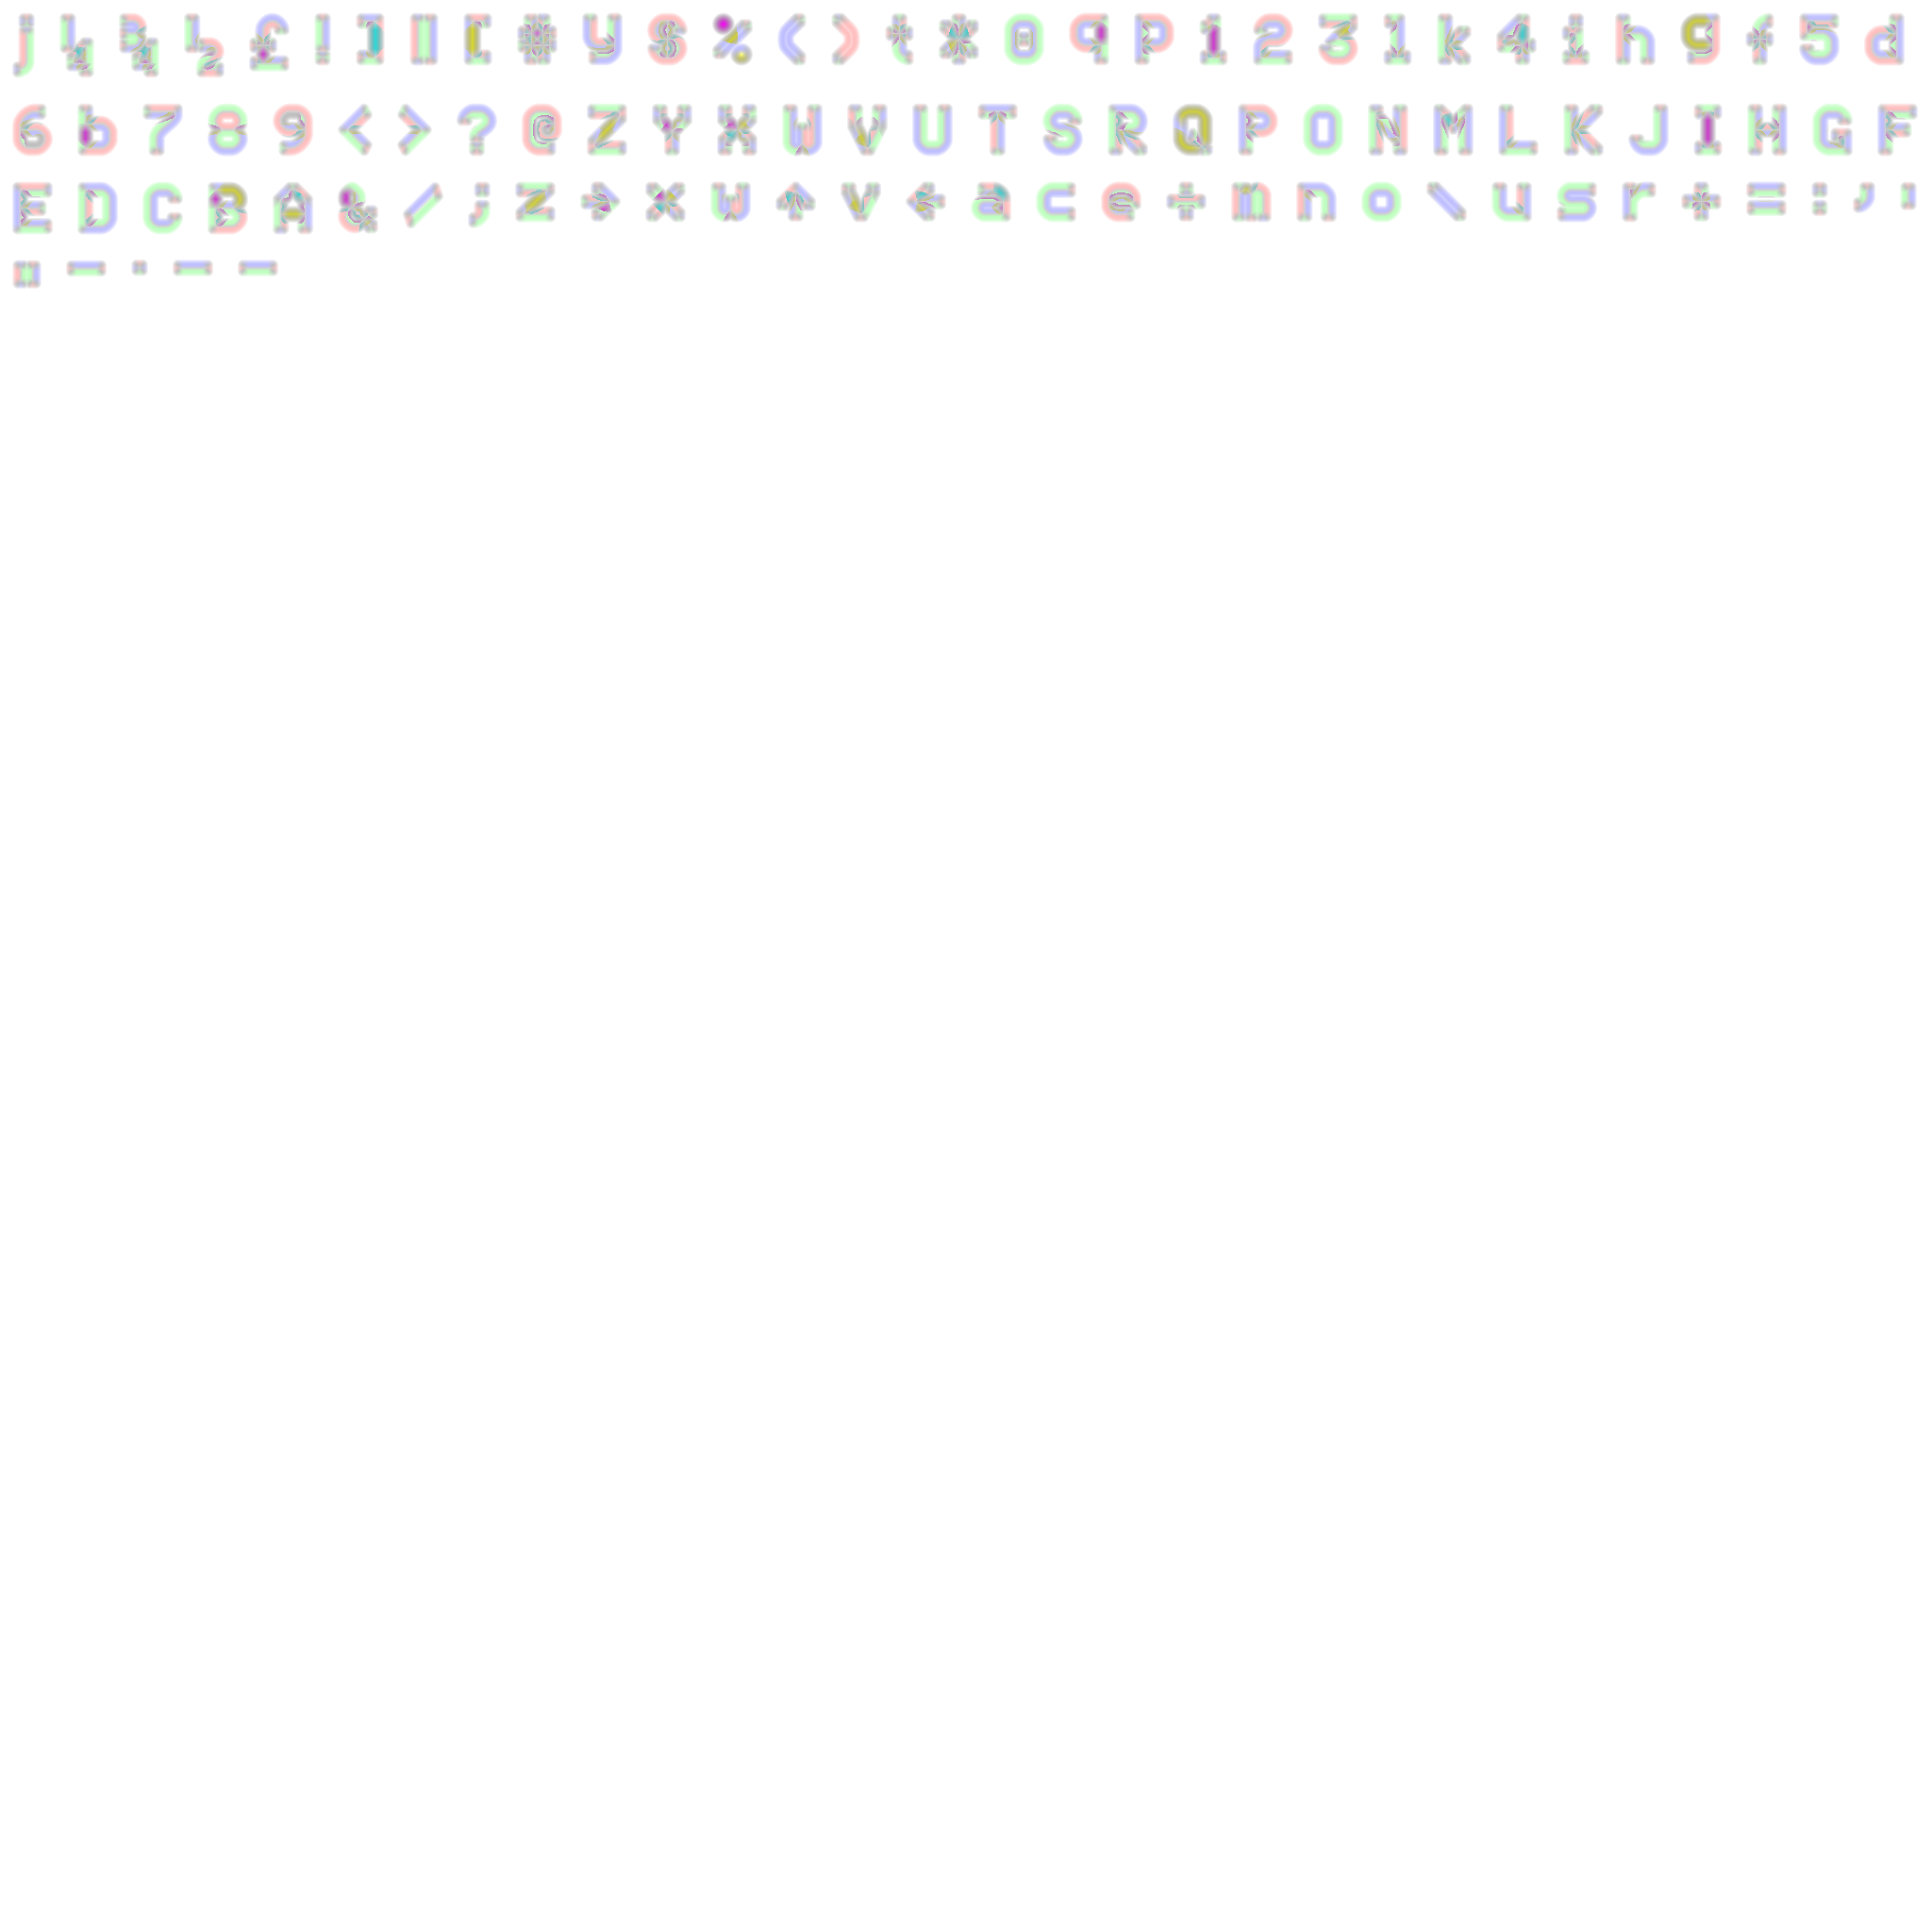
Converting a font into an MSDF atlas is made easy with the msdf-atlas-gen tool. It is able to convert any font file into both the atlas for your GPU and a JSON file that describes what characters the font has and how to position them (e.g. kerning data).
For our game, we ended up pre-baking multiple fonts into 2048x2048 PNGs offline, which our renderer uploads to the GPU as textures when the game starts.
Drawing A Single Glyph
For the most part, these MSDF glyphs are rendered in the same way a typical sprite would be. See engine overview for more information on that topic.
However, special fragment shader code is necessary to convert the MSDF data encoded in the RGBA channels of the texture into a color that the fragment shader should output.
vec3  msdf           = sampleAtlas(uv);
float signedDistance = median(msdf.r, msdf.g, msdf.b);

// Scale the distance into screen pixels using the derivatives of the texture
// coordinates. This is what makes the anti-aliasing resolution independent.
float screenPxDistance = screenPxRange(uv) * (signedDistance - 0.5);
float coverage         = clamp(screenPxDistance + 0.5, 0.0, 1.0);

color = vec4(textColor.rgb, textColor.a * coverage);
The median of the three channels is the reconstructed signed distance. Anything past the 0.5 threshold is inside the glyph, anything short of it is outside, and the narrow band in between becomes the anti-aliased edge. Because the band width is computed from how large the glyph is on screen this frame, the edge is exactly one pixel wide, and therefore crisp at any size.
Character Positioning: Walking A Cursor
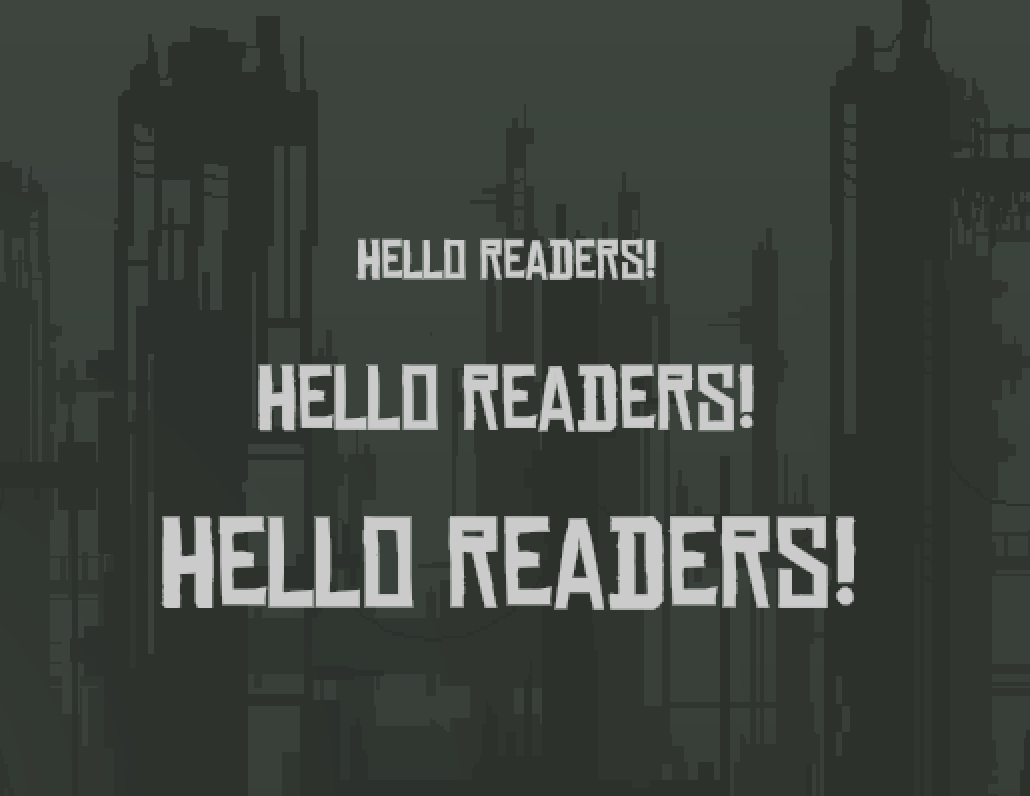
Positioning individual character glyphs is a fun programming exercise. I highly recommend trying it out sometime. We created a class, CHText, that manages all of this. It is able to load a string, font data, and atlas data and convert that into carefully positioned vertices that can be uploaded to the GPU.
Most fonts ship with a “kerning table”, which is data that explains how far the next glyph should be placed from the previous glyph, depending on what they are. For example, some fonts might want to push the slanted lines closer together (“AV”) or nestle something under a capital T (“T.”).
To lay glyphs out properly, we use a “cursor” to walk through the string and increment the x position based on kerning data and character size, incrementing the y position once we reach the end of a line. Spaces and newlines simply move where the cursor is currently positioned. Each word is counted as one block of distance, because wrapping needs to move a whole word to the next line:
cursor = (0, font.lineHeight);   // glyphs hang off a baseline, so start one line down

while (index < text.length) {
    if (text[index] == '\n') { cursor = (0, cursor.y + font.lineHeight); index++; continue; }
    if (text[index] == ' ')  { cursor.x += font.glyph(' ').xAdvance;     index++; continue; }

    // Lay out the next word from zero, measuring as we go.
    x = 0;
    for (i = index; i <= endOfWord(index); i++) {
        addVertex(font.glyph(text[i]), at: glyph.glyphBoundsPosition + (x, 0));
        x += font.glyph(text[i]).xAdvance + font.getKerningAmount(text[i], text[i + 1]);
    }

    if (x > maxWidth - cursor.x)                    // this word doesn't fit on this line
        cursor = (0, cursor.y + font.lineHeight);

    translateWordVertices(by: cursor);              // drop it where the cursor is
    cursor.x += x;
    index = endOfWord(index) + 1;
}
Revealing text over time, like in the video at the top of the post, is also implemented by CHText. It accomplishes this by only including certain characters in the vertex data uploaded to the GPU:
revealNextCharacter() {
    m_charactersRevealed++;
    m_vertexData = firstN(m_copyVertices, m_charactersRevealed);
}
CHRichText: Tokens, Not Characters
While CHText is critical for turning a string into something renderable, it’s kind of boring. It can only render in a single color, at a single size, with no per-word behavior. Our game wanted a little more pizzazz.
So, we implemented our own markup system and supporting class. CHRichText is able to convert a specially-encoded-but-still-easy-to-write string into something more exciting. It works by chopping the string into individual tokens, and then applying effects to some of those tokens.
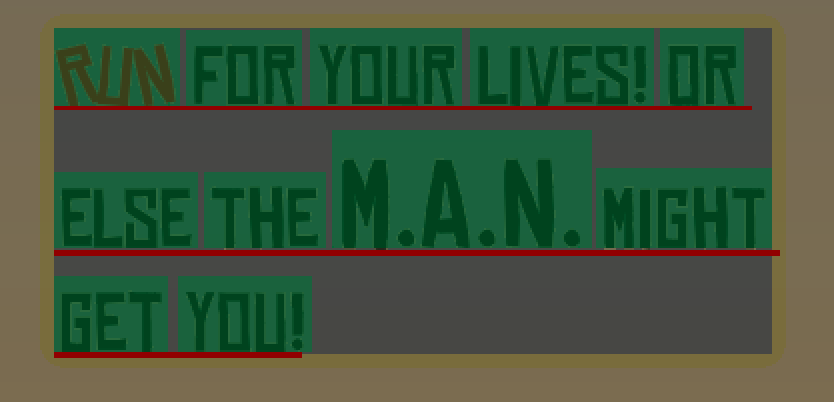
Our markup language is very simple. Tokens wrapped between {list,of,effects} and {} will have those effects applied to them. Authoring a dire warning is as simple as writing:
{shaking,red}RUN{} for your lives! Or else the {big}M.A.N.{} might get you!
Our code chops that string into individual CHRichTextTokens, which carry both the thing to be rendered and the effects to apply to it. Notice that we also decided to support inline sprites as something a CHRichTextToken could encode.
struct CHRichTextToken
{
    std::string                       plainText;    // exactly one word
    std::vector<CHRichTextEffectEnum> textEffects;  // what applies to it
    std::weak_ptr<CHText>             textObject;   // ...or
    std::weak_ptr<CHRenderTarget>     spriteObject; // ...this, for inline art
};
So the string above parses to:
{ "RUN ",    [SHAKING, RED] }
{ "for ",    [] }
{ "your ",   [] }
{ "lives! ", [] }
...
{ "M.A.N. ", [BIG] }
After splitting the string into tokens, we construct CHText and/or CHSprite objects per token, and apply each effect to each CHText or CHSprite. These are what ultimately get rendered. Some effects simply modify the underlying text once (for example, increasing its size), while other effects live as objects owned by the CHText and continually modify it as it updates (by, for example, causing individual letters to shake). CHText has been designed so that the effects can mutate whatever data they need to.
Because some of the effects cause some tokens to change size ({big}) or move around ({shaking}), CHRichText needs to do a positioning pass on top of what each individual token does. For our purposes, we landed on doing two positioning passes. One pass constructs and horizontally positions each token, and then a second pass vertically positions everything. We need the second pass because the height of each individual token isn’t known until effects have been applied.
Text Effects
A CHRichTextEffect is implemented as an object that has access to the CHText it needs to modify. It holds a pointer to its target’s vertex data, so it can change the token as a whole or reach in and move the individual character glyphs inside it.
Effects come in two flavors. Some fire once, on install, and never do anything again:
case RED:    target.setColor(CHColor::red());                       break;
case BIG:    target.setScale(1.5f * target.getScale());             break;
case STINKY: target.addChild(makeEmitter(WORD_FLIES));              break;
case EPIC:   target.setColor(rarityColor(EPIC));
             target.addChild(makeRarityEmitter(EPIC));              break;
STINKY is my personal favorite. It adds a particle emitter as a child of the text token, so flies orbit the text itself.
Other effects run every frame and mutate vertices directly. Since a character is a single vertex, a per-character animation is a loop over an array.
// Every frame, rebuild one local transform per character.
case WAVING:
    for (vertex : target.vertices) {
        float phase = sin(lifetime * 3.f + vertex.position.x / 20.f);
        transformFor(vertex).translate(0.f, phase * WAVE_HEIGHT);
    }
    break;

case SHAKING:
    for (vertex : target.vertices) {
        float angle = randomInRange(-14.f, 14.f);
        transformFor(vertex).rotate(angle, centerOf(vertex));
    }
    break;

case PULSING:
    for (vertex : target.vertices) {
        // Each character's bump starts slightly after the one before it.
        float s = bumpCurve(cycleTime - charIndex * 0.15f);
        transformFor(vertex).scale(s, s, centerOf(vertex));
    }
    break;
The vertex.position.x / 20.f term in WAVING is what makes it a wave rather than a bounce: each character samples the sine curve at a slightly different phase based on how far along the word it sits. PULSING does the same thing with an explicit per-character delay instead.
RAINBOW doesn’t touch transforms at all. It writes color straight into the vertices using the same phase offset:
case RAINBOW:
    for (vertex : target.vertices) {
        float phase = (sin(lifetime * 3.f + vertex.position.x / 20.f) + 1.f) / 2.f;
        vertex.color = hsv2rgb(phase * 360.f, 1.f, 1.f);
    }
    break;
Inline Sprites And Button Glyphs
Not every token becomes text. Certain effects hijack a token entirely and replace it with a sprite:
{sprite} is an effect that decodes the token’s text as a sprite and pulls the art out of our atlas repository. {glyph} decodes it as an input action and asks the input system for the matching button image.
if (token.hasEffect(GLYPH)) {
    action = decodeInputAction(token.plainText);        // e.g. "JUMP"
    glyph  = new CHGlyphSprite(currentInput, action);   // A button? Space? LMB?

    // If the player swaps from keyboard to controller mid-sentence, the glyph
    // changes size, so the whole layout has to be rebuilt.
    glyph.setOnInputDeviceChangedCallback([this]() { m_tokensNeedRebuild = true; });

    glyph.scaleToFitLineHeight(font.getLineHeight());
    token.spriteObject = glyph;
}
So Press {glyph}JUMP{} to jump! renders the actual key or button the player is currently bound to, live. Unplug a controller mid-dialogue and the sentence fixes itself on the next update.
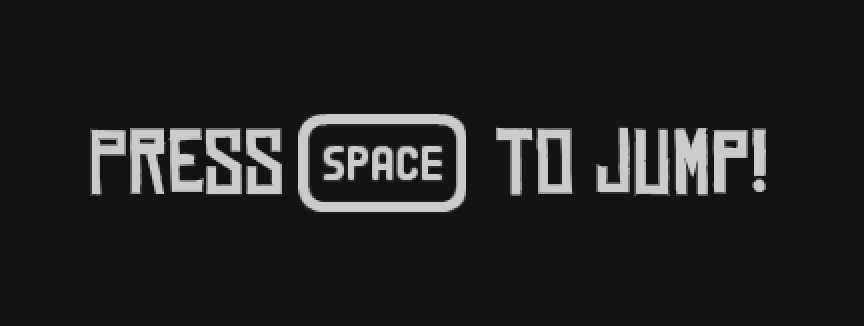
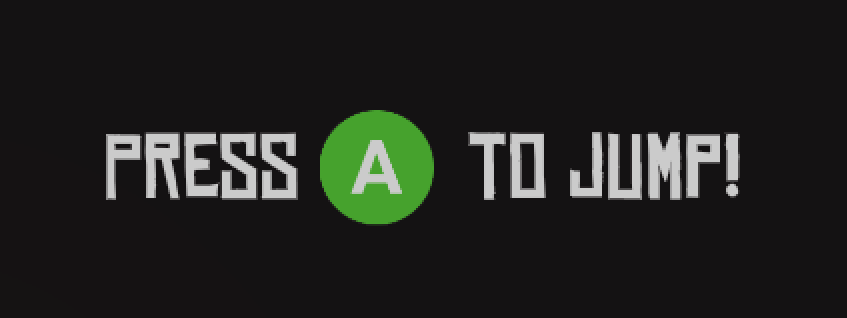
One string, two input devices, zero branches in the dialogue data.
Talking Out Loud
Dialogue reveals character by character, which CHRichText drives by walking its token list and calling revealNextCharacter() on the current token until it’s exhausted, then moving to the next.
Effects can also affect the reveal cadence. {slow} multiplies the time to reveal characters for its token, so a single word can drag while the rest of the line clips along at the normal 0.05 seconds per character.
Every few characters, we play a voice sound. There’s no recorded dialogue in the game, so the “voice” is a small set of syllable samples pitched by the character being revealed:
int hash  = (int)character * 1369 + 1000;    // incredibly advanced hashing algorithm
sound     = voiceSamples[hash % voiceSamples.size()];
pitch     = minPitch + (hash % pitchRange) / 100.f;
Because the hash is derived from the character, the same word always sounds the same way. It isn’t speech, per se, but it’s close enough without needing to hire voice actors! Different speakers get different sample sets and pitch ranges: a deep male voice, a robot, a muffled mumble, and squeaks for the biomaggots. If it works for Banjo-Kazooie, it can work for us!
Reading It All Back
In this post we covered:
- Atlases are baked offline into MSDF textures.
- Individual glyphs are rendered by sampling the MSDF textures with special fragment shader logic.
CHTextturns a string into a set of vertices, walking a cursor word by word and populating everything our rendering pipeline needs to draw the characters.CHRichTextparses markup into one token per word, gives each token its ownCHText, and lays those out so that every word on a line shares a baseline set by the tallest word on it.- Effects are objects attached to the token they modify. Some fire once to change color or scale or attach a particle emitter. Others rewrite a per-character transform every frame.
- Tokens can be art instead of text: inline sprites and controller-correct button glyphs slot into the same layout, and rebuild themselves when the player changes input device.
None of this is what a player or level designer needs to think about. They read the line, hear the squeaks, see the word shaking, and move on.